
How can a Dutch counting frame make it easier for a child to learn times tables and number bonds?
In this blog I’m going to look at the rekenrek, a simple arithmetical tool that is growing in popularity.
Now, in the decades I’ve spent as a qualified teacher, I’ve seen plenty of changes in the types of tools we employ to educate our children.
Technology changes and methods evolve. It can be a challenge for parents and grandparents to keep up!
Just compare the approach to reading that was taught in the 20th century with how children learn today. My granddaughter Daisy is perfectly comfortable telling me about split digraphs. Much of her familiarity with phonemes has come via play-based tablet apps.
Mathematics is no different. When many of us parents and grandparents learned arithmetic, resources like number lines and bar models were simply not part of our toolkit.
Making sense of numbers
One increasingly popular classroom tool is the rekenrek (although it’s fresh enough that it isn’t yet recognised by my spellcheck!).
At first glance, you may be forgiven for dismissing the rekenrek as an abacus. And indeed the name means ‘accounting rack’ in Dutch. But it’s more interesting than that.

At least in its smaller incarnation, a rekenrek is different from a conventional abacus, on which each rod of beads might be assigned a different place value (ones, tens, hundreds). On the rekenrek, each bead has the exact same unit value: one.
While I’ll be focusing on how to use a 20-bead frame, smaller (10 bead) and larger (100 bead) frames are available.
At its core, it’s a simple colour-coded counting frame that does a very important job. It builds a child’s number sense by helping them to visualise amounts and quickly make addition and subtraction calculations.
These are foundational maths skills, and hands-on experience can be a great way to approach the learning journey, compared to written calculations alone.
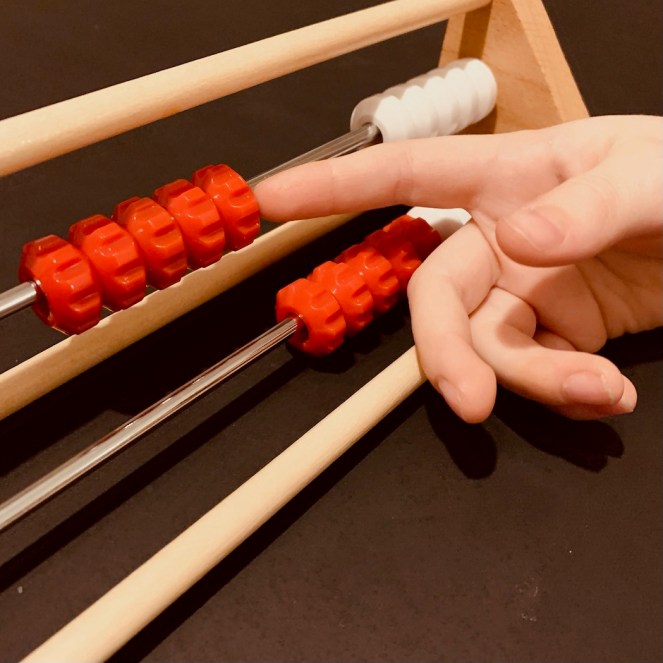
A 20-bead counting frame has two rods, like the one you can see pictured throughout this blog.
As you can see, it has five red beads and five white beads on each line. On my rekenrek, the white and red beads are differently textured to help make the process more tactile and to assist children who have visual impairments.

‘Ground rules’ of the rekenrek
To get the most from a rekenrek activity with a child, it can be useful to set some ground rules. (Especially if it’s being used in a classroom context!)
The first rule is that the rekenrek is a tool not a toy. The rack will make for an attractive rattle in some children’s minds, but to get the most out of the activity we should avoid having those beads clatter back and forth!
As this video shows, children should be encouraged to focus on making ‘tool noises not toy noises’, and to slide or push the beads across the rods quietly.
The second rule is that the rekenrek’s default starting position is that white goes on the right – all the white beads should be on the right of the rack, with the red beads next to them.
The third rule is to move the beads in groups. Instead of sliding the beads and counting each one individually, we aim to slide them across in groups to improve subitising (that’s a topic to which I will return shortly).
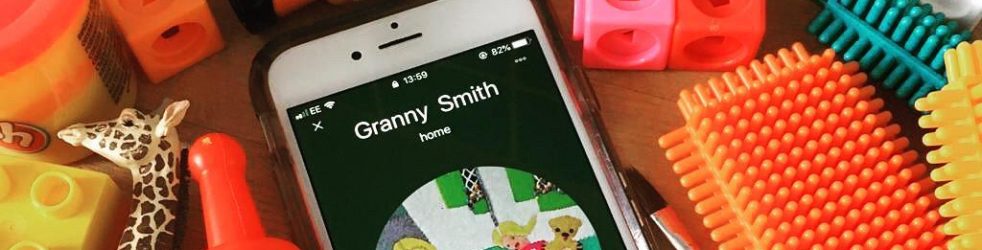
Daisy discovers the rekenrek
I was excited to introduce this new tool to my granddaughter, Daisy. As an educator and a doting granny, I relish my opportunities to help her with her homework, and Daisy seems to enjoy sharing her homework with me!
At the moment using number bonds to 10 is a major focus for Daisy at school. She is progressing onto using number bonds and subtraction facts up to 20.
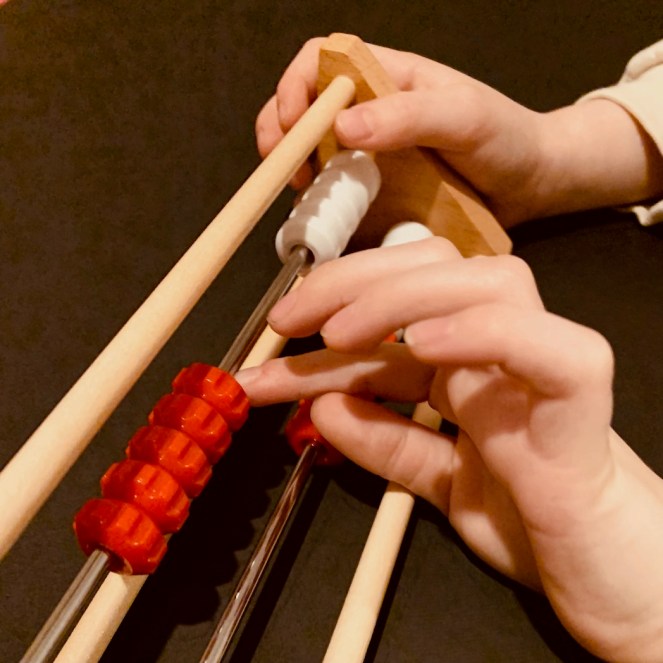
Once we’d been through the ground rules mentioned above, we started using the rekenrek to demonstrate the relationships between numbers to help build on Daisy’s existing number bond understanding.
First, I asked her how many white beads she could see on the top row, and then how many red beads. This established that each colour-coded set of beads on the frame represented 5.
Daisy knows that 5 beads and 5 beads equals 10, so she could quickly move 10 beads without having to count them individually (one bead, two beads, three beads…).
Instantly, Daisy was able to subitise these amounts. As the Numberblocks say, ‘don’t count – see the amount!’
The beads can be used to show number relationships and the fundamental principles of addition and subtraction.
Exploring number bonds
Next we used the two rods of the frame to practise her number bonds from 1-10.
For example, I asked Daisy about the number bond for 7. Immediately she slid over 5 red beads to the left, followed by two more white beads to make 7. That left 3 white beads, and gave her not only the answer but a memorable visualisation.

Then we did ‘opposites’ on the frame, showing 7 and 3 on the top row, and 3 and 7 on the bottom row. When we had completed the opposites set on the top and bottom rows, and counted each group, we then pushed all the beads towards the left to show 10 beads together. This reinforced that the number bond added up to 10.
We continued to use the frame to show all of the number bonds for 10: 10 and 0, 9 and 1, 8 and 2, 7 and 3, 6 and 4, 5 and 5, 4 and 6, 3 and 7, 2 and 8, 1 and 9, 10 and 0. Each time we pushed the beads, ‘white to the right’ to start the number bond and then pushed the beads together on the left after creating the number bond. This reinforced the idea that these number bonds are for the number 10.
As Daisy continued to use the rekenrek frame she became more confident and moved onto other activities to practise number bonds.

One example that Daisy engaged well with: push the beads to the right and cover most of these beads with your right hand. Then slide over a small number of beads to the left (for instance, 4) and then ask how many beads will be revealed remaining on the right hand side (in this case, 6). Finish the activity by pushing the beads over together to show that the total is 10.
An array of approaches
The rekenrek will be one of many resources in Daisy’s arithmetical toolkit in her early years.
When approaching maths problems, she also uses counters (like Mathlink cubes), number lines and number boards.
Similarly, she counts on her fingers, uses mental arithmetic and sometimes even old-fashioned rote recall.
I hope you can already see how this simple tool can make learning early mathematics both more visual and a little more interesting.
Granny Smith says…
- You can also use these rekenrek number bond activities to help with practising writing numbers. You can create simple written addition and subtraction sums to show how the number bonds are ‘represented’ when we write them. For instance, the number bond for 7 becomes 7 + 3 = 10. And the number bond for 3 can be written down as 3 + 7 = 10.
- On a similar note, I mentioned the follow-on activity in which I slid out 4 beads and covered the remaining 6 for Daisy to calculate. This can be written down as 4 + ? = 10 and Daisy can fill in the answer. It could also be written as 10 – 4 = ?
